| .github/workflows | ||
| docs/img | ||
| src/nqrduck_autotm | ||
| .gitignore | ||
| CHANGELOG.md | ||
| LICENSE | ||
| pyproject.toml | ||
| README.md | ||
NQRduck Module: nqrduck-autotm
A module for the nqrduck project. This module is used to automatically tune and match mechanical and electrical probe coils.
The module is used as a graphical user interface for the ATM-system. The ATM-system consists of a C++ program running on the ESP32 microcontroller. The NQRduck autotm module communicates with the ESP32 microcontroller using the USB interface.
For mechanically tunable probe coils stepper motors for Tuning and Matching are used. For electrically tunable probe coils varactor diodes are used. The system is able to output a Tuning and Matching voltage in a range from 0 to 5V.
Additionally, the system can measure the S_{11} parameter of the probe coil over a frequency range.
Installation
Requirements
Dependencies are handled via the pyproject.toml file.
Setup
To install the module you need the NQRduck core. You can find the installation instructions for the NQRduck core here.
Ideally you should install the module in a virtual environment. You can create a virtual environment by running the following command in the terminal:
python -m venv nqrduck
# Activate the virtual environment
. nqrduck/bin/activate
You can install this module and the dependencies by running the following command in the terminal while the virtual environment is activated and you are in the root directory of this module:
pip install .
Usage
The module is used together with the ATM-system. Connect the ATM-system to the PC running the NQRduck program. You can connect to the ATM-system using the 'Tuning and Matching' tab in the NQRduck program.
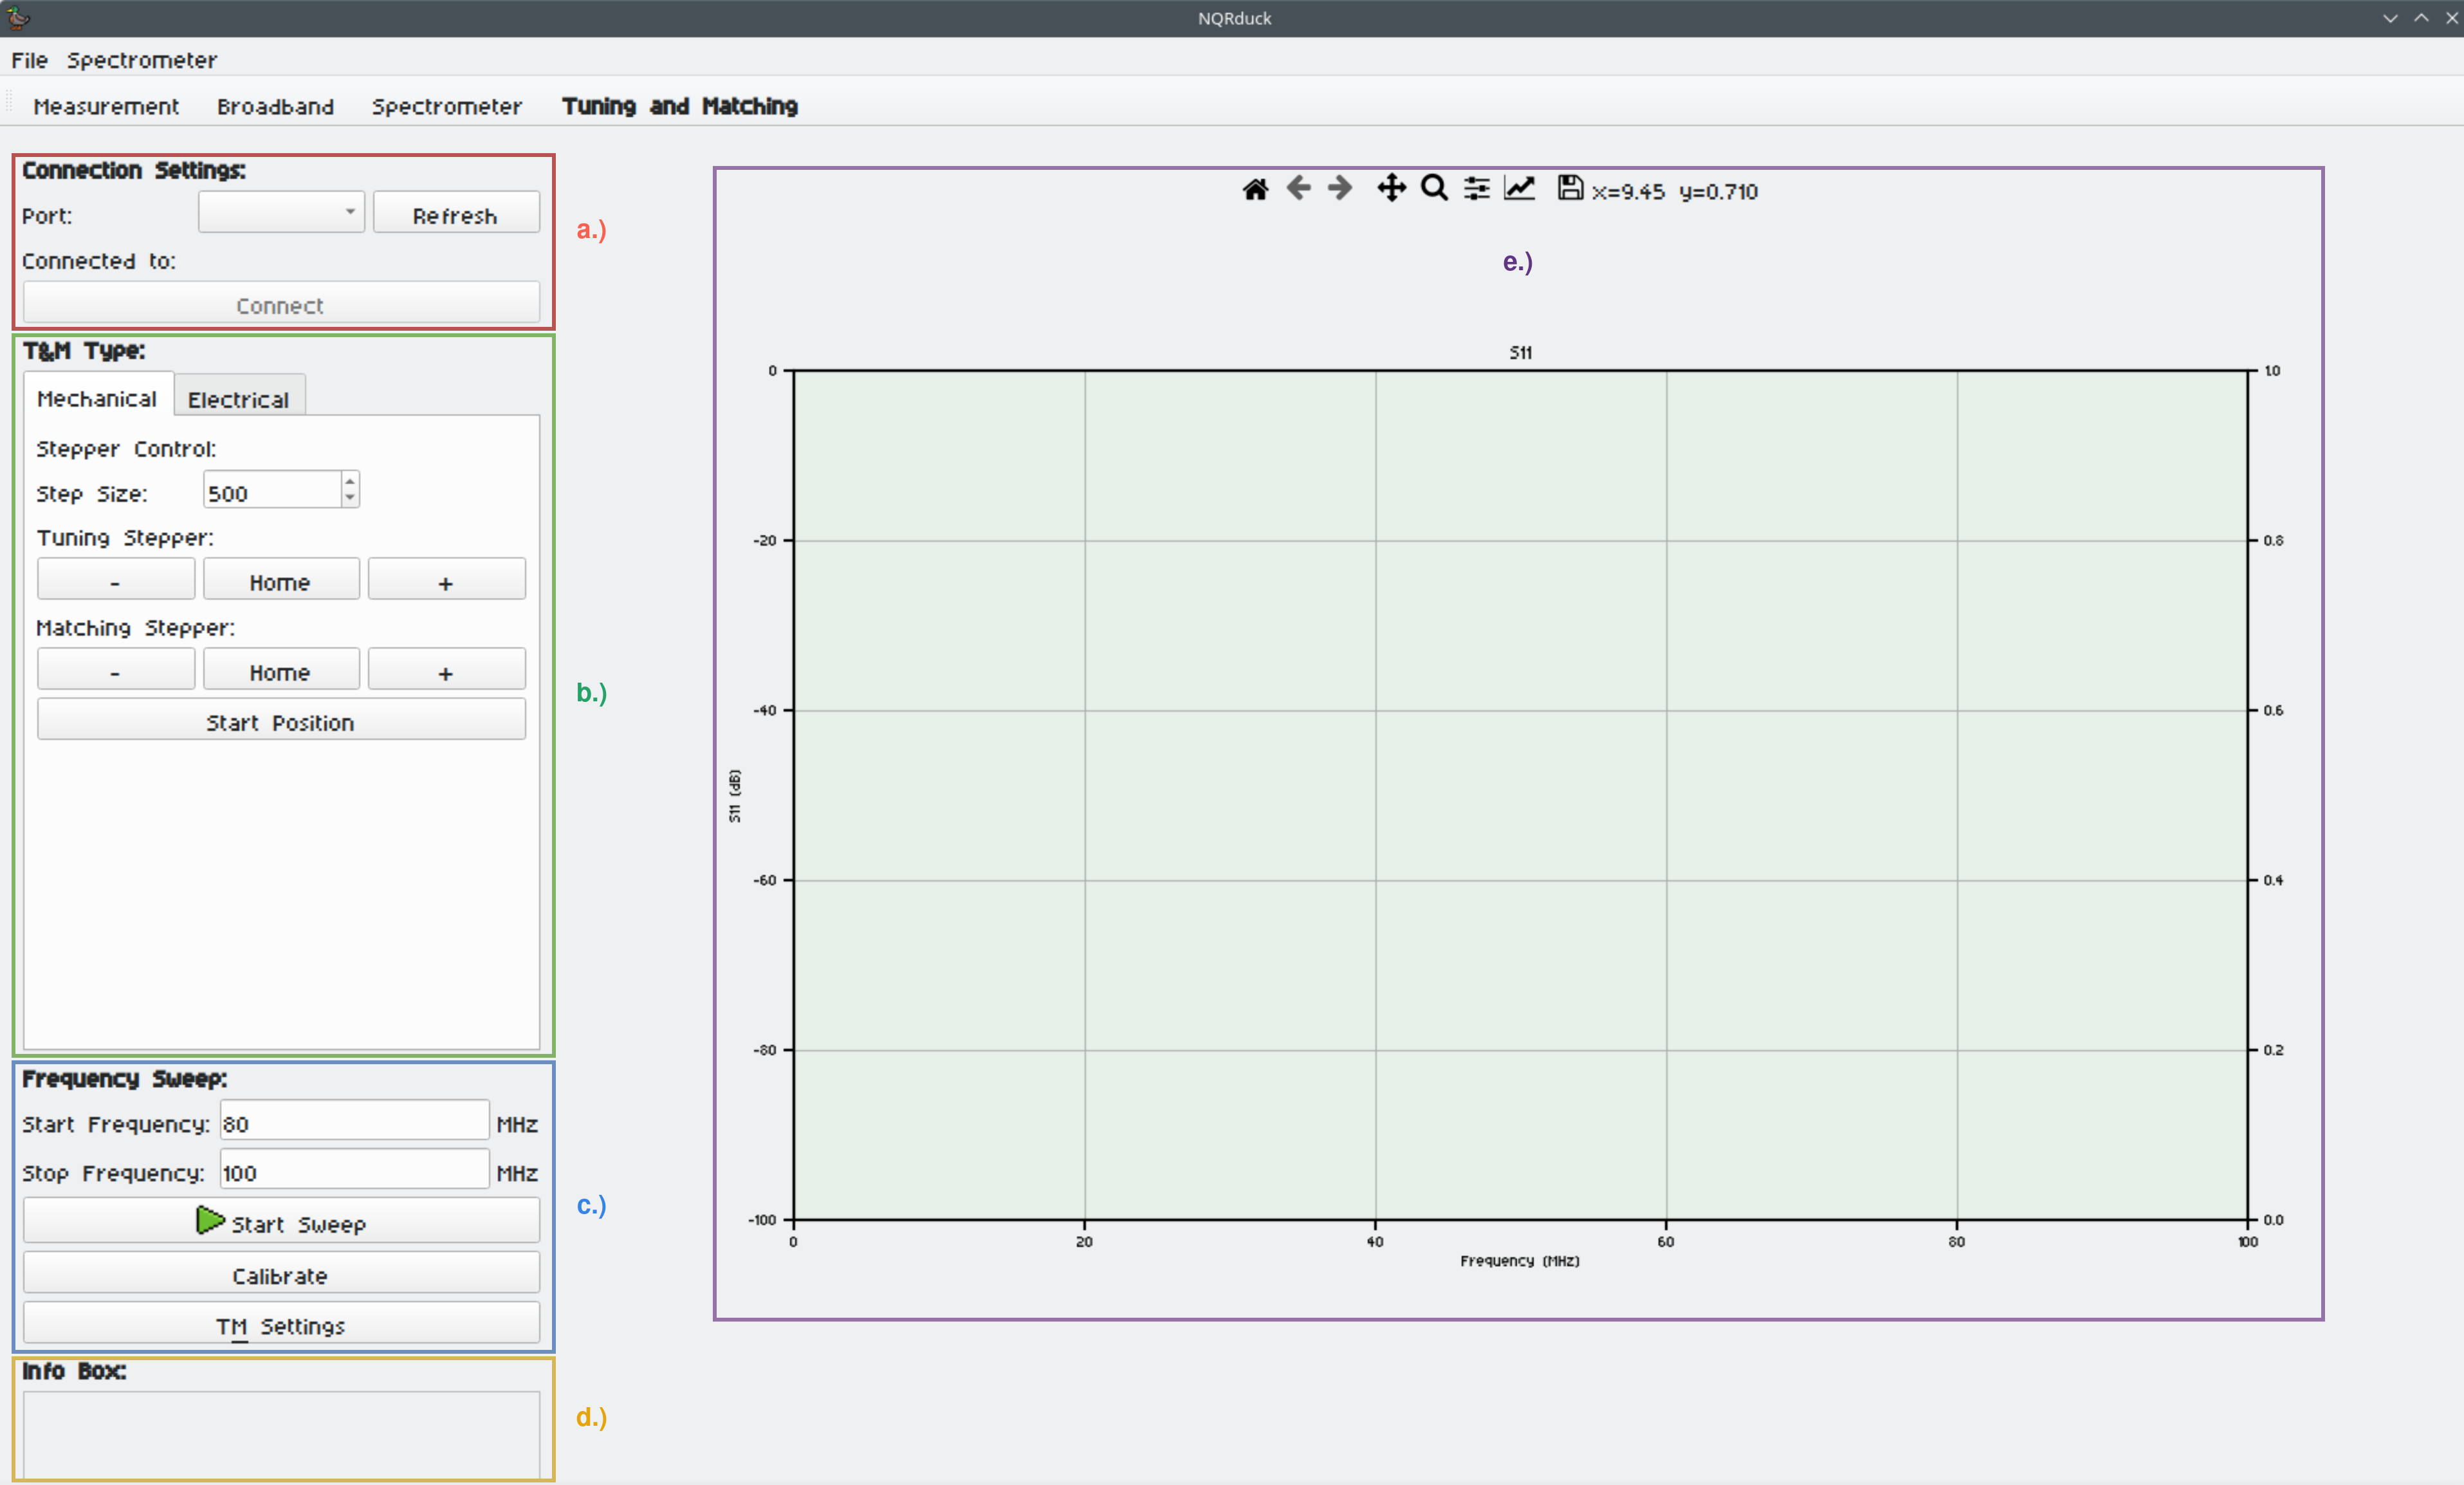
- a.) The Connection settings for connecting to the ATM-system.
- b.) The 'Tuning and Matching' tab. Here you can control the ATM-system and switch between electrically and mechanically tunable probe coils.
- c.) The
S_{11}tab. Here you can measure theS_{11}parameter of the probe coil over a frequency range. - d.) The 'Info Box'. Here you can see the current status of the ATM-system.
- e.) The
S_{11}plot. Here you can see the measuredS_{11}parameter of the probe coil over a frequency range.
Notes
- The active user needs to be in the correct group to use serial ports. For example 'uucp' in Arch Linux and 'dialout' in Ubuntu.
License
This project is licensed under the MIT License - see the LICENSE file for details
Contributing
If you're interested in contributing to the project, start by checking out our nqrduck-module template. To contribute to existing modules, please first open an issue in the respective module repository to discuss your ideas or report bugs.